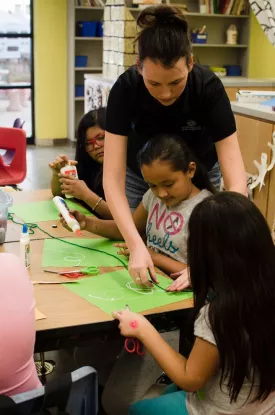
The following list of materials is optional. Feel free to select as many options as you can/want, including any additional arts and craft supplies you may have on hand.
Paper with different textures (e.g., construction, copy, watercolor, pastel, etc.)
Duct tape
Sandpaper
Wood
Fabric
Sponges
Scissors
Crayons
Paint (any kind)
Natural material (e.g., leaves, sticks, moss, rocks, sand, etc.)
Colored pencils
Pens and/or markers
Glue sticks
Fabric
Old T-shirts, smocks or aprons to protect youth clothing
A large table or group work space covered with drop cloths or tablecloths to protect surfaces as needed
Cardboard (placed out to cover the table space)
Instructions
Youth create a collaborative mixed media scene.
Step 1
Say, “We’re going to explore creating mixed media artwork today. We’ll create a scene such as an ocean, forest or city. Media can be things like colored pencils or paint. Creating a mixed media artwork means you are using more than one type of media together in one piece. You will have a chance to explore different media, what they feel like and what you could do with them together. There is no right or wrong way to do this!”
Share all the media youth have to work with. Informthem that they can mix the medias together however they want. For example, they can add sand to paint or use duct tape to put sticks together.
Say, “Let’s decide what scene we will make together. Who has an idea?”
Allow youth to decide on a scene together.
Discuss the different objects, animals, people, etc. that would be in this scene. For example:
An ocean scene could have water, waves, fish, sea creatures, boats, swimmers, submarines, kelp, reefs, etc.
A city scene could have buildings, roads, people, cars, bridges, tunnels, buses, parks, etc.
Step 2
Say, “Great. You will create your scene on this piece of cardboard. Now take a moment to pick out the first type of media you’d like to use to create our group scene.”
Allow youth time to get their media and start creating the scene.
Encourage youth to cover the surface of the cardboard with color and media.
Prompt youth to go get a new type of media after a few minutes. Continue to allow time for youth to try different types of media to create elements in the scene.
Encourage youth to explore different ways they can use the media, for example:
Paper can be ripped, folded, glued or taped
Pastels can be smudged over paint
Moss or leaves can be added to paint
Sponges can be used to apply chalk, pastel or watercolor
Fabric can be rolled, folded, torn or glued
Help young children use materials when needed.
Support youth to observe each other to see how they can add to the group scene.
Encourage youth to rotate where they are standing around the table as they add to different sections.
Use guiding questions to help exploration. For example:
“Have you tried ... ?”
“What happens when ... ?”
“What do you notice here ... ?”
Allow youth to continue until the cardboard is filled or for as long as time allows.
Step 3 (Optional)
Say, “Now take a step back and walk around the table to look at all the different parts of our scene. Find another type of media and add something new to our scene.”
Allow youth more time to add another element to the scene, contributing to the group’s work.
Continue this project over multiple days if interested and as time and schedule allows.
Reviews